Rendered in Unreal Engine 5.2
Lighting and Cinematography by Freddy Bendekgey
Metahuman and animation from Epic Marketplace, edited by Freddy Bendekgey
Landscape and building assets by Austin Farmer
Assets and foliage courtesy of Epic Marketplace, edited and placed by Eliezer Garcia Gazaui and Austin Farmer
EasyFog courtesy of William Faucher
Music: "Aquarium" by Kevin MacLeod (incompetech.com)
Licensed under Creative Commons: By Attribution 4.0 License
http://creativecommons.org/licenses/by/4.0/
Process
File Infrastructure
"The Hidden Valley" is a short animated clip that I produced in collaboration with two other SCAD students in Savannah over a period of about three weeks. Because we were collaborating remotely from different locations, we needed to quickly and effectively share files. I took charge on file sharing infrastructure, creating a series of folders for our unique levels and assets. Our asset folders included materials, instances, animations, sequences, and other small files that we had revised, which we could share with one another quickly. We kept larger files such as static meshes and textures separate, to avoid continuously passing large files back and forth. We passed updated versions of levels back and forth to share specific settings within our scene, such as object transformations and foliage.
For this project, I researched Perforce and Git as methods of version control and file sharing. Given the time constraints to create the finished clip, we ultimately shared files over Dropbox. I also created documentation for maintaining our file infrastructure and fixing any broken file reference pathways.
Metahuman and animation
I created the Metahuman in the Unreal Engine Metahuman creator, then imported it into my asset folder and revised the material instances directly in the Unreal Engine. I imported animations from animation packs, retargeted them to my Metahuman, then edited the animation at individual joints. Finally, I blended the animation weights in each scene to help the character motion flow more naturally. Below are screenshots of the Metahuman, a few of the materials and animations that I edited, and the animated sequences that I created.
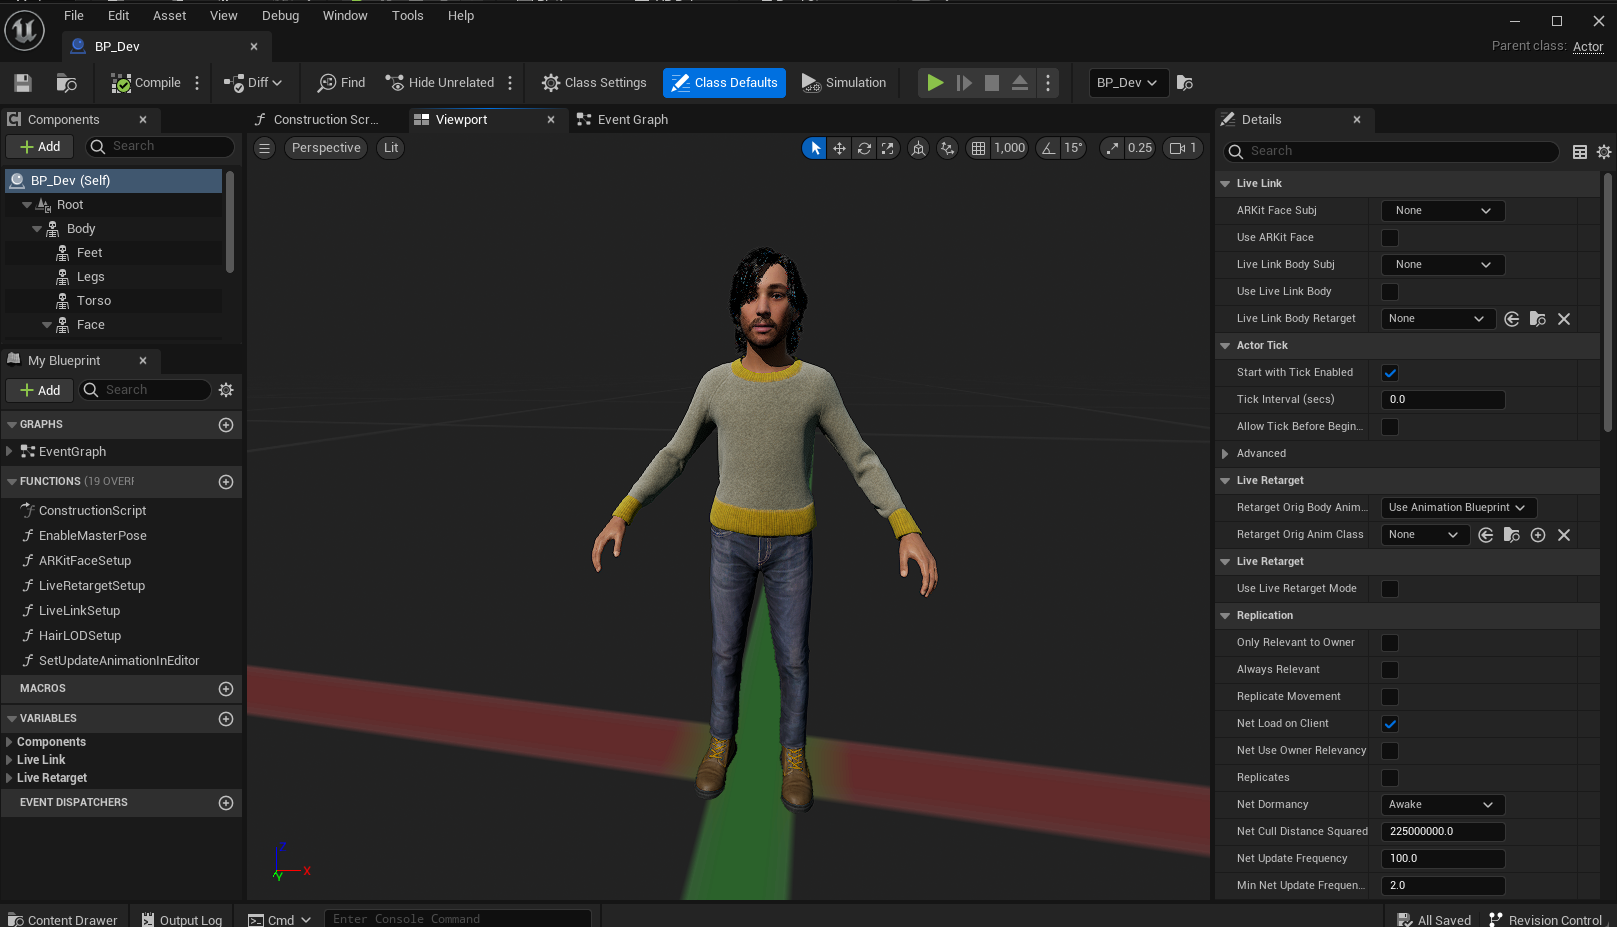
Metahuman
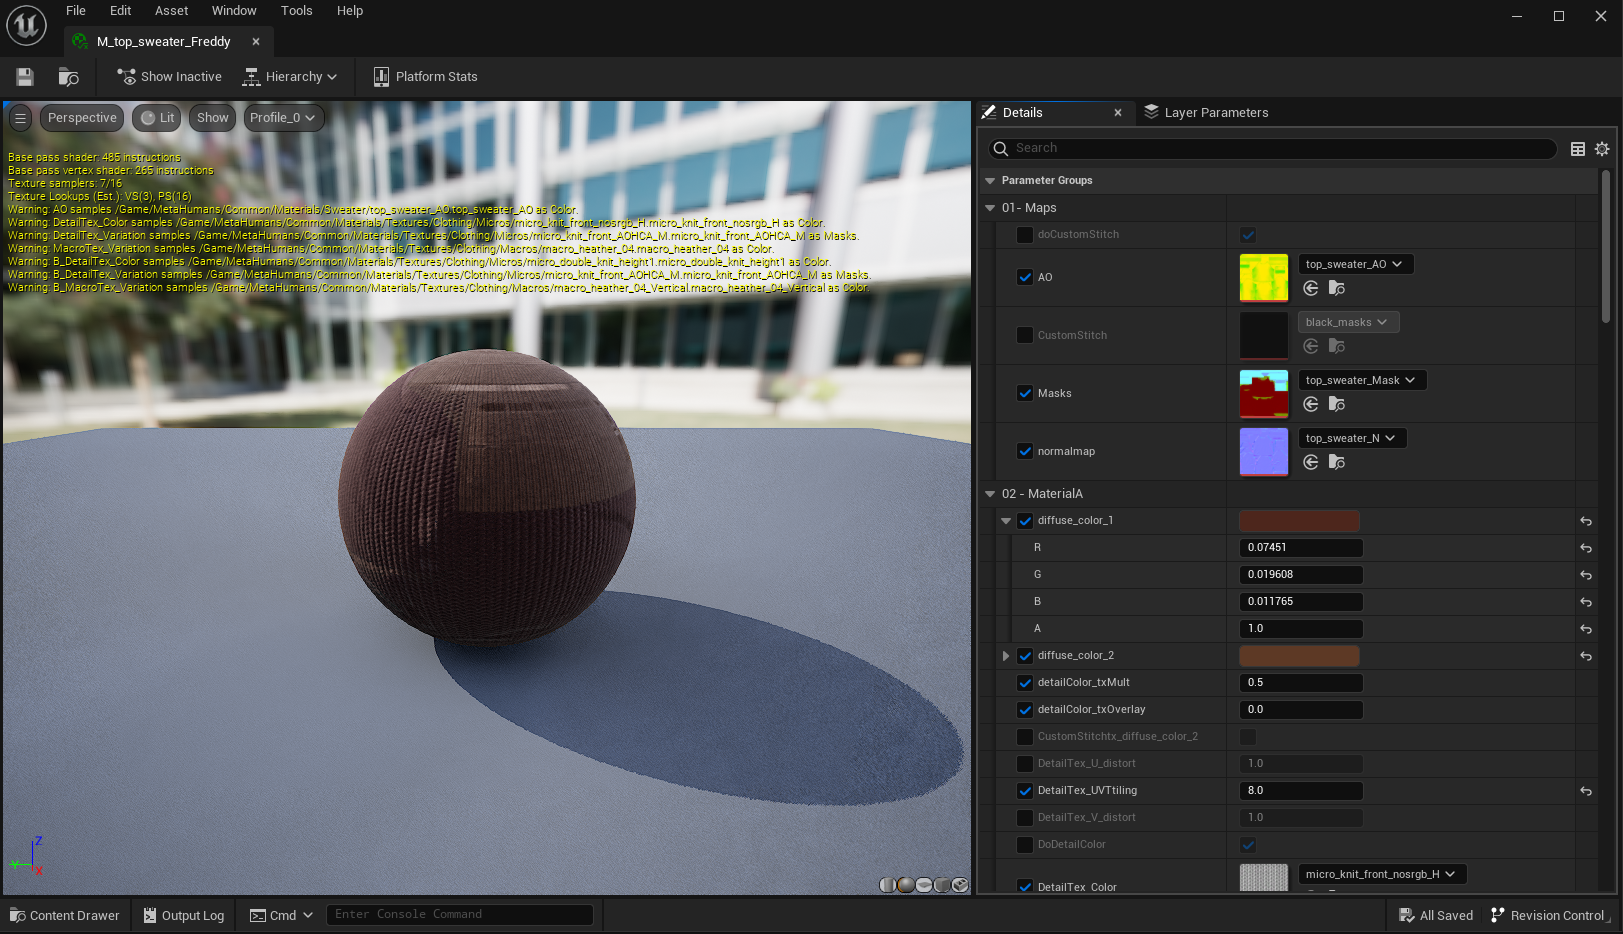
Sweater material instance
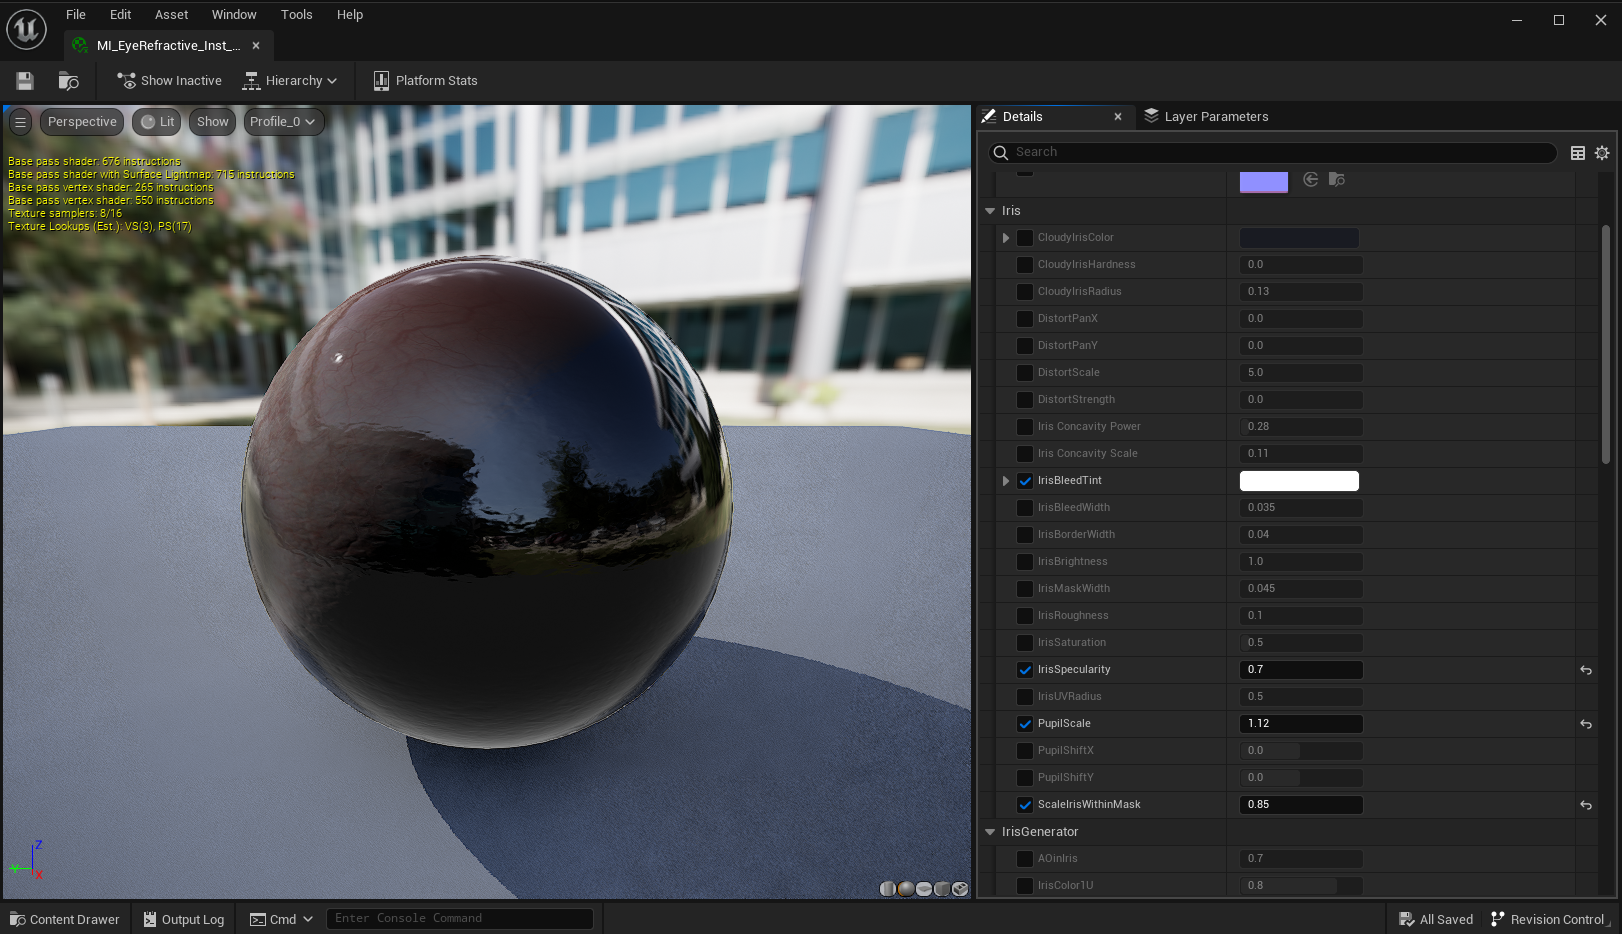
Eye refraction material instance

Revised Metahuman animation
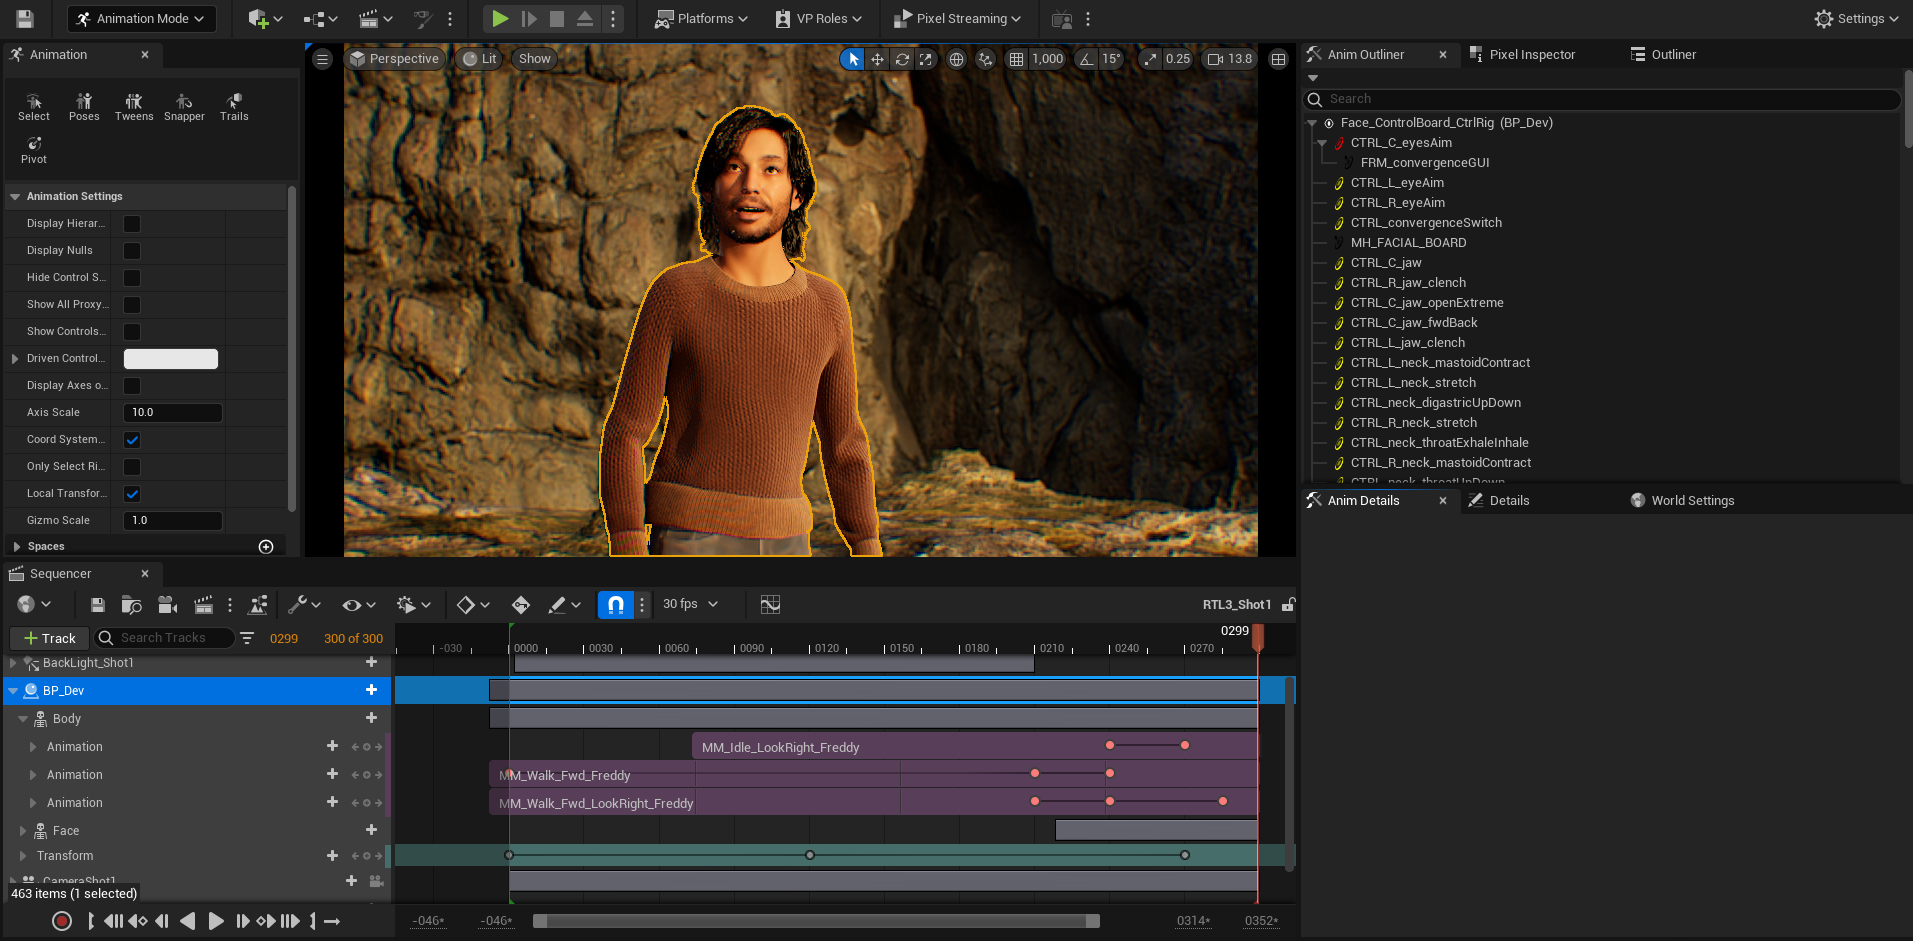
Scene 2 animation
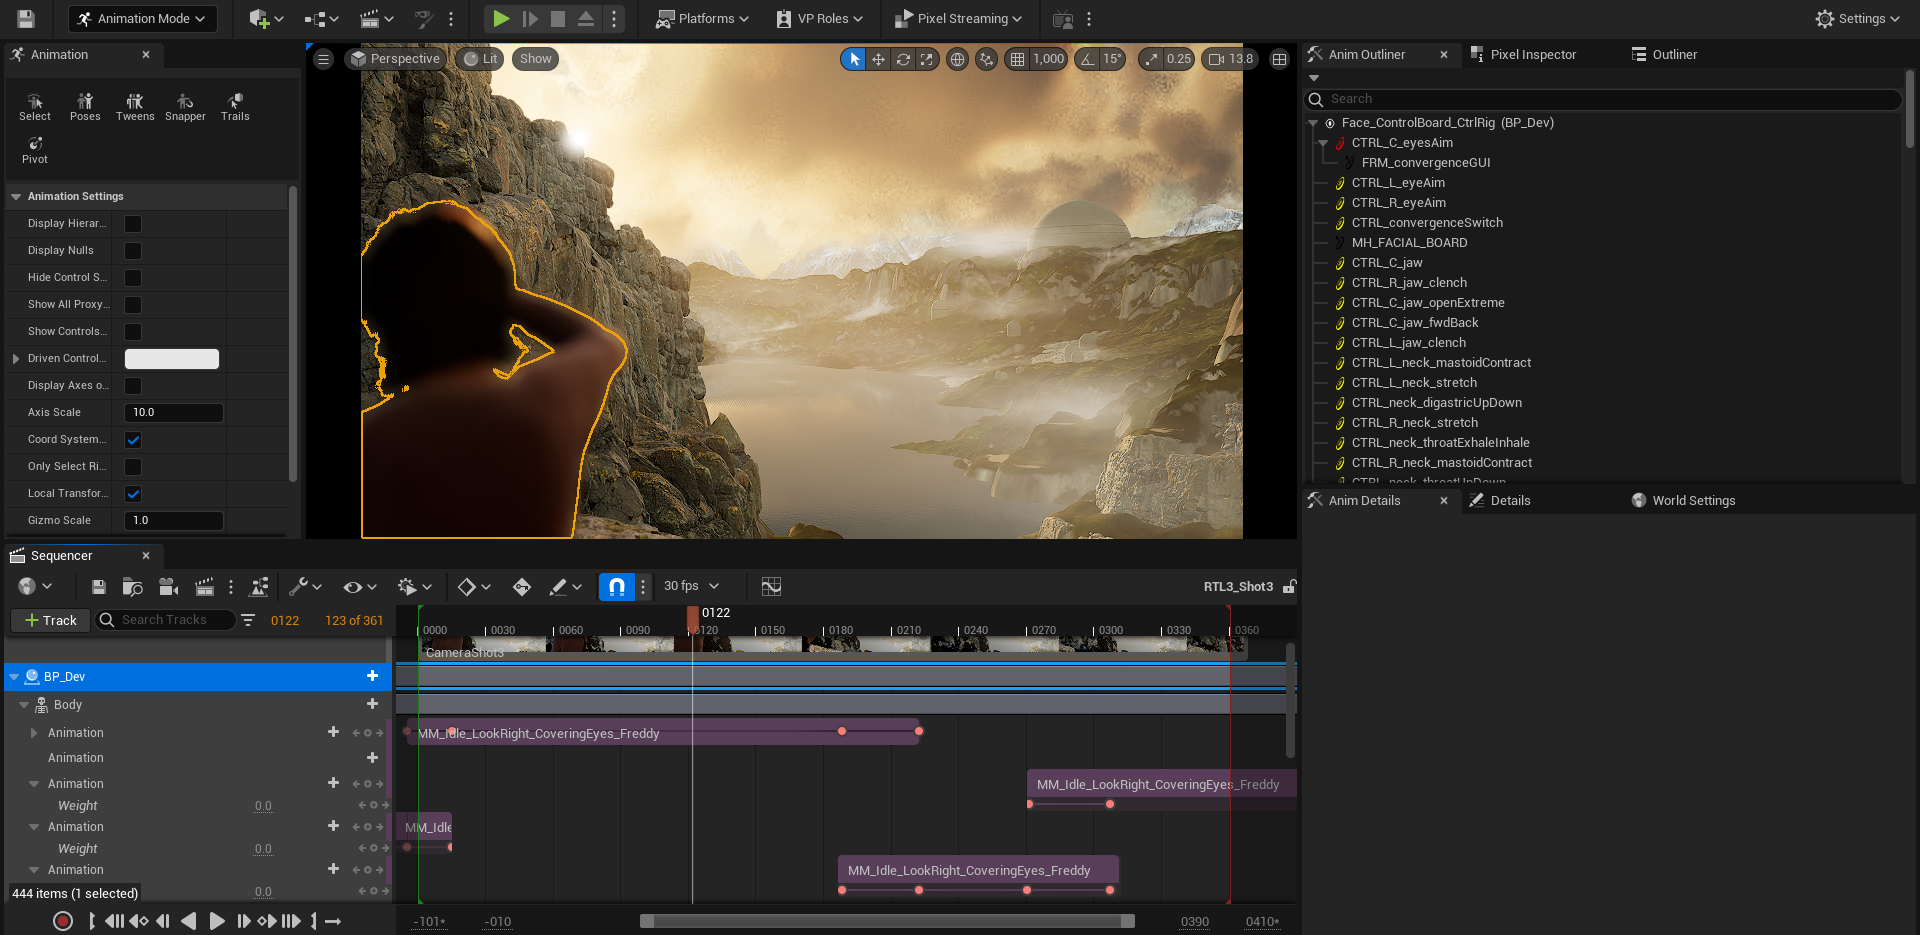
Scene 3 animation
Console Commands and Render Settings
To create realistic lighting for such a large landscape, we needed to change the Unreal Engine's default render settings. Our team inputted simple console commands to remove ray tracing culling and enable two-sided geometry. This prevented shadows from popping in and out of our scene, and made shadows look more naturalistic for both distant objects and one-sided static meshes. I animated the lens flare and camera exposure in scenes 2 and 3 to create the flash of light. Finally, I manually inputed console variables into my render settings to improve the quality of the scene's ray tracing, shadows, reflections, and motion blur.